[JSP/Ajax] Ajax basic 기본 개념과 문법 (+ xml, json 설명)
[ AJAX ] : Asynchronous JavaScript And XML = "비동기 통신" : 비동기 통신의 주체는 JavaScript와 XML(최근에는 JSON)이다 ★ 핵심 ★ 동기적 방식의 전체 페이지를 응답받는 것이 아니라, "필요한 데이터"만..
creamilk88.tistory.com
Maven pom 설정
/pom.xml
<dependencies>
  <!-- Spring-Web MVC Framework -->
  <dependency>
    <groupId>org.springframework</groupId>
    <artifactId>spring-webmvc</artifactId>
    <version>4.3.14.RELEASE</version>
  </dependency>

  <!-- Ajax Jason Library (jackson-databind) -->
  <dependency>
    <groupId>com.fasterxml.jackson.core</groupId>
    <artifactId>jackson-databind</artifactId>
    <version>2.9.5</version>
  </dependency>
</dependencies>
★web.xml과 springmvc-servlet.xml은 WEB-INF 폴더에 같이 두어야 한다! ★
DD (Deploytment Descriptor) 설정
/web.xml
<?xml version="1.0" encoding="UTF-8"?>
<web-app xmlns:xsi="http://www.w3.org/2001/XMLSchema-instance" xmlns="http://xmlns.jcp.org/xml/ns/javaee" xsi:schemaLocation="http://xmlns.jcp.org/xml/ns/javaee http://xmlns.jcp.org/xml/ns/javaee/web-app_3_1.xsd" version="3.1">
  <display-name>SpringMVC3-Annotation</display-name>
  <welcome-file-list>
    <welcome-file>index.jsp</welcome-file>
  </welcome-file-list>

  <!-- servlet 설정 -->
  <servlet>
  	<servlet-name>springmvc</servlet-name>
  	<servlet-class>org.springframework.web.servlet.DispatcherServlet</servlet-class>
    <load-on-startup>1</load-on-startup>
  </servlet>

  <!-- servlet-mapping 설정 -->
  <servlet-mapping>
	  <servlet-name>springmvc</servlet-name>
	  <url-pattern>*.do</url-pattern>
  </servlet-mapping>


  <!-- POST 방식으로 전송 시, 한글처리를 위한 인코딩 설정 -->
  <filter>
  	<filter-name>EncodingFilter</filter-name>
  	<filter-class>org.springframework.web.filter.CharacterEncodingFilter</filter-class>
  	<init-param>
  		<param-name>encoding</param-name>
  		<param-value>utf-8</param-value>
  	</init-param>
  </filter>

  <filter-mapping>
  	<filter-name>EncodingFilter</filter-name>
  	<url-pattern>/*</url-pattern>
  </filter-mapping>

</web-app>
Spring configure 설정
* namespace에서 context, mvc 추가
1. IOC 설정
<context:component-scan> : IOC, DI, DL에 대한 설정
1) 컴포넌트 계열의 어노테이션이 명시된 클래스에 대해 객체를 생성하고,
2) DI 계열 어노테이션이 명시된 대상에 대해 해당 객체를 주입하는 역할을 한다.
2. SpringMVC 설정
3. ViewResolver 설정 : client에게 응답하는 view에 대한 설정
/springmvc-servlet.xml
<?xml version="1.0" encoding="UTF-8"?>
<beans xmlns="http://www.springframework.org/schema/beans"
	xmlns:xsi="http://www.w3.org/2001/XMLSchema-instance"
	xmlns:context="http://www.springframework.org/schema/context"
	xmlns:mvc="http://www.springframework.org/schema/mvc"
	xsi:schemaLocation="http://www.springframework.org/schema/beans http://www.springframework.org/schema/beans/spring-beans.xsd
		http://www.springframework.org/schema/context http://www.springframework.org/schema/context/spring-context-4.3.xsd
		http://www.springframework.org/schema/mvc http://www.springframework.org/schema/mvc/spring-mvc-4.3.xsd">

	<!-- IOC 설정 -->
	<context:component-scan base-package="org.kosta"></context:component-scan>

	<!-- SpringMVC 설정 : annotation 기반 controller 설정 -->
	<mvc:annotation-driven/>

	<!-- ViewResolver 설정 : client에게 응답하는 view에 대한 설정 -->
	<bean id="ViewResolver" class="org.springframework.web.servlet.view.InternalResourceViewResolver">
		<property name="prefix" value="/views/"/>
		<property name="suffix" value=".jsp"/>
	</bean>

	<!-- error page 설정 -->
	<bean class="org.springframework.web.servlet.handler.SimpleMappingExceptionResolver">
		<!-- views/error.jsp로 응답 -->
		<property name="defaultErrorView" value="error"/>
	</bean>
</beans>
Model
/org.kosta.model
/CustomerVO.java
package org.kosta.model;

public class CustomerVO {
	private String id;
	private String name;
	private String address;

	public CustomerVO() {
		super();
	}

	public CustomerVO(String id, String name, String address) {
		super();
		this.id = id;
		this.name = name;
		this.address = address;
	}

	public String getId() {
		return id;
	}

	public void setId(String id) {
		this.id = id;
	}

	public String getName() {
		return name;
	}

	public void setName(String name) {
		this.name = name;
	}

	public String getAddress() {
		return address;
	}

	public void setAddress(String address) {
		this.address = address;
	}

	@Override
	public String toString() {
		return "CustomerVO [id=" + id + ", name=" + name + ", address=" + address + "]";
	}
}
View
1. String 반환 - 문자열 데이터로 응답
2. VO or DTO 반환 - JSONObject로 응답
3. List 반환 - JSONArray로 응답
4. List<VO> 반환 - JSONArray 내부의 요소가 JSONObject로 응답
5. JSON이 아닌 개별 데이터(String)로 응답받을 때, 한글 처리 하기
@RequestMapping(value=[url], produces="application/text;charset=utf-8")
* JSON (JavaSript Object Notation) : 구조화된 데이터를 응답하는 방식
/ajax-test.jsp
<%@ page language="java" contentType="text/html; charset=UTF-8"
pageEncoding="UTF-8"%>
<!DOCTYPE html>
<html>
<head>
<meta charset="UTF-8">
<script src="https://ajax.googleapis.com/ajax/libs/jquery/3.5.1/jquery.min.js"></script>
<title>ajax-test</title>
<script type="text/javascript">
//현 페이지의 document가 초기화되면 실행
// => 아래의 이벤트를 바인딩 한다.(등록)
$(document).ready(function() {
$("#ajaxBtn1").click(function() {
//alert($(this).val());
$.ajax({
type: "GET",
url: "testAjax1.do",
data: "userId=javaking",
success: function(result) { //String으로 전달된다
alert(result);
}
});
});//ajasBtn1
$("#ajaxBtn2").click(function() {
$.ajax({
type: "GET",
url: "testAjax2.do",
dataType: "json",
data: "customerId=java",
success: function(result) { //json object로 전달된다
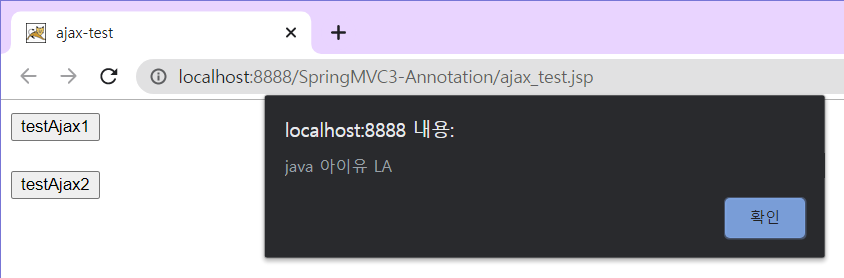
alert(result.id + " "+result.name + " "+ result.address);
}
})
});//ajaxBtn2
$("#ajaxBtn3").click(function() {
$.ajax({
type: "GET",
url: "testAjax3.do",
dataType: "json",
data: "customerId=java",
success: function(result) { //jsonArray로 전달된다
for (var i = 0; i < result.length; i++) {
alert(result[i]);
}
}
})
});//ajaxBtn3
$("#ajaxBtn4").click(function() {
$.ajax({
type: "GET",
url: "testAjax4.do",
dataType: "json",
data: "customerId=java",
success: function(result) {
//JSONArray(요소는 JSONObject)로 전달된다.
for (var i = 0; i < result.length; i++) {
alert(result[i].name + " " + result[i].address);
}
}
})
});//ajaxBtn4
$("#ajaxBtn5").click(function() {
$.ajax({
type: "GET",
url: "testAjax5.do",
success: function(result) { // 개별 문자열 데이터로 응답받는다
alert(result);
}
})
});//ajaxBtn5
});//ready
</script>
</head>
<body>
<!-- String으로 반환하여, 문자열 데이터로 받는 Ajax 테스트 -->
<input type="button" value="testAjax1" id="ajaxBtn1"><br><br>
<!-- VO, DTO로 반환하여, JSON Object 로 응답받는 Ajax 테스트 -->
<input type="button" value="testAjax2" id="ajaxBtn2"><br><br>
<!-- List로 반환하여, JSONArray로 응답받는 Ajax 테스트 -->
<input type="button" value="testAjax3" id="ajaxBtn3"><br><br>
<!-- List로 반환하여, JSONArray 내부의 요소가 JSONObject로
응답받는 Ajax 테스트
: alert으로 JSONArray내의 JSONObject의 name과 address 출력 -->
<input type="button" value="testAjax4" id="ajaxBtn4"><br><br>
<!-- JSON이 아닌 개별 데이터(String)로 응답받을 때, 한글 처리 하기 -->
<input type="button" value="testAjax5" id="ajaxBtn5"><br><br>
</body>
</html>Controller
/org.kosta.Controller
-- annotation --
@Controller
@ResponseBody : Ajax 방식 응답
- Ajax응답은 일반 응답과 달리, 페이지가 아닌 '필요한 데이터'만 응답한다.
이를 위해서 @ResponseBody를 명시한다.
- 핸들러 메서드(컨트롤러 메서드)에서 String 형식으로 반환하면, 문자열 데이터로 응답한다.
(만약 한글이 포함되면 별도의 추가 설정이 필요)
- 핸들러 메서드(컨트롤러 메서드)에서 VO or DTO 형식으로 반환하면 JSON Object로 응답한다.
- List 형식으로 반환하면, JSONArray 형태로 응답한다.
/MyAjaxController.java
package org.kosta.controller;
import java.util.ArrayList;
import org.kosta.model.CustomerVO;
import org.springframework.stereotype.Controller;
import org.springframework.web.bind.annotation.RequestMapping;
import org.springframework.web.bind.annotation.ResponseBody;
@Controller
public class MyAjaxController {
@RequestMapping("testAjax1.do")
// Ajax응답은 일반 응답과 달리,
// 페이지가 아닌 '필요한 데이터'만 응답한다.
// 이를 위해서 @ResponseBody를 명시한다.
@ResponseBody //Ajax 방식 응답 (page-X, data-O)
//핸들러 메서드에서 반환하는 String 정보를 클라이언트에게 문자열 데이터로 응답하게 한다.
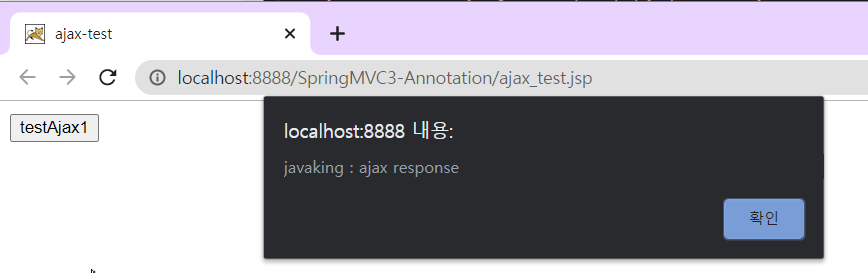
public String testAjax1(String userId) {
return userId + " : ajax response";
}
@RequestMapping("testAjax2.do")
@ResponseBody //ajax 방식 응답
//VO Object로 return했으므로, JSONObject 객체로 응답한다.
public CustomerVO testAjax2(String customerId) {
return new CustomerVO(customerId, "아이유", "LA");
}
@RequestMapping("testAjax3.do")
@ResponseBody //ajax 응답
//List로 반환했으므로, JSONArray로 응답한다.
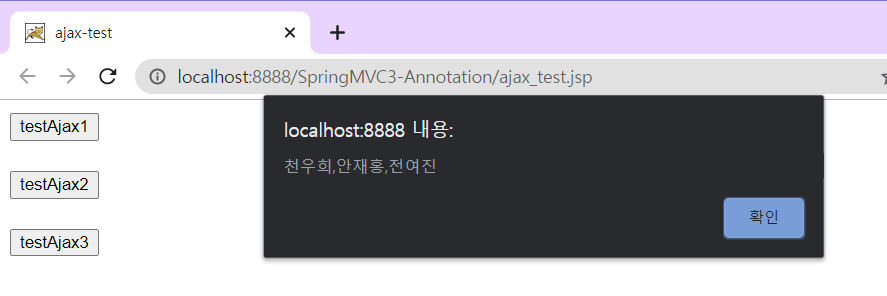
public ArrayList<String> testAjax3(String customerId){
ArrayList<String> list = new ArrayList<String>();
list.add("천우희");
list.add("안재홍");
list.add("전여진");
return list;
}
@RequestMapping("testAjax4.do")
@ResponseBody
public ArrayList<CustomerVO> testAjax4(String customerId){
ArrayList<CustomerVO> list = new ArrayList<CustomerVO>();
list.add(new CustomerVO(customerId, "아이유", "LA"));
list.add(new CustomerVO("mvc", "천우희", "여의도"));
list.add(new CustomerVO("aop", "정승희", "한남동"));
return list;
}
/*
* Ajax 응답 시, JSON 형식(VO, DTO or Map or List)이 아닌,
* 개별 문자열로만 응답할 때에는,
* 별도의 한글 처리가 필요하다!
*/
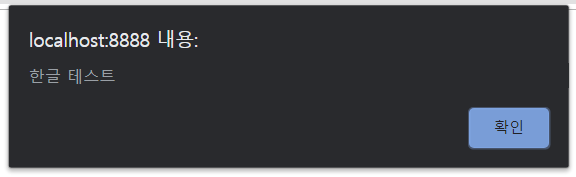
@RequestMapping(value="testAjax5.do", produces="application/text;charset=utf-8")
@ResponseBody
public String testAjax5() {
return "한글 테스트";
}
}
[ 결과 ]
> 홈화면 (ajax-test.jsp)
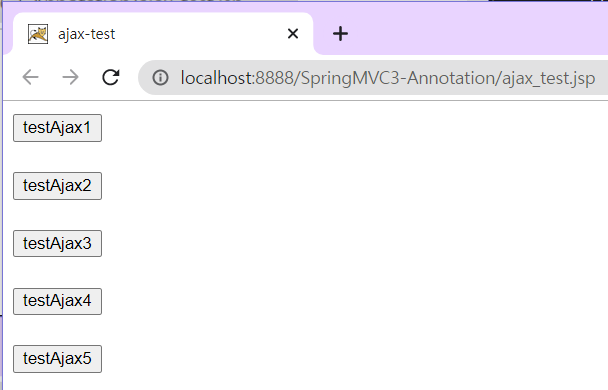
> testAjax1 클릭하면,
> testAjax2 클릭하면,
> testAjax3 클릭하면,
> testAjax4 클릭하면,


> testAjax5 클릭하면,
'Java Web Programming > 6. Spring | MyBatis' 카테고리의 다른 글
| [SpringMVC/MyBatis] SpringMVC + 마이바티스 연동 연습 2 (JSTL) (0) | 2020.11.10 |
|---|---|
| [SpringMVC/MyBatis] SpringMVC + 마이바티스 연동 연습 1 (0) | 2020.11.09 |
| [SpringMVC] has a 관계 - Annotation기반의 SpringMVC 연습 2! (0) | 2020.11.09 |
| [SpringMVC] Annotation 어노테이션 기반의 SpringMVC 연습! (2) | 2020.11.05 |
| [Spring] 스프링 AOP Annotation 어노테이션 (0) | 2020.11.05 |


